Tuesday 21 December 2010

Honey And Balsamic Glazed Chicken And Rice Pudding

So, it's been a fair wee while since I blogged. Looks like December's going to be the lightest month in terms of blogs this year. Ah well.

This one's a cracker. Or at least the food is... the writing may leave something to be desired.

***

Starting with the honey glazed chicken then. I winged it a little on the glaze, so I'm really not sure of the quantities.

I mixed about two parts honey to one part balsamic vinegar. Threw in a dash of worcestershire sauce to cut through the sweet taste and crunched in a good cracking of black pepper. Mix it all thoroughly together with a little water (just enough to get a good consistency for pouring) and there you have it. I was cooking ten chicken legs, so I made about enough to fill half a small dessert bowl.

The chicken is very easy to prepare. Take your drummers and score through each one a couple of times right down to the bone. This will allow the chicken to absorb more flavour from the glaze as it cooks. Ideally, to get the most flavour, you would marinade the chicken in the glaze for a few hours.

Heat the oven up to about 180°C before putting in the chicken. It'll take around 30 minutes to cook through. Brush the glaze onto the legs and pour any excess over the top before putting them into the oven.

Every ten minutes, pull out the chicken and baste the legs with the glaze that has run off.

When it's ready, serve it up... I went with some sweet potato mash and sweetcorn. Then I realised that this made the plate decidedly yellow.

For the mash I just boiled the potatoes before mashing them up with a lot of butter, about 40ml cream, a pinch of salt, and a good cracking of pepper.

Then it was time for pudding...

***

With the cold weather, there's nothing for it but to make hot, filling puddings. Yes.

For rice pudding you will need:

- 180g short grain rice (pudding rice)
- 75g caster sugar
- 410g evaporated milk
- 1pt milk
- 25g butter
- jam (optional)

This is a spectacularly easy pudding to put together. You hardly have to do anything.

You need an oven proof dish, maybe about 10" long and at least 2" deep. Lay the rice in the bottom with the sugar before pouring on all the liquid. Then float little chunks of butter on the surface.

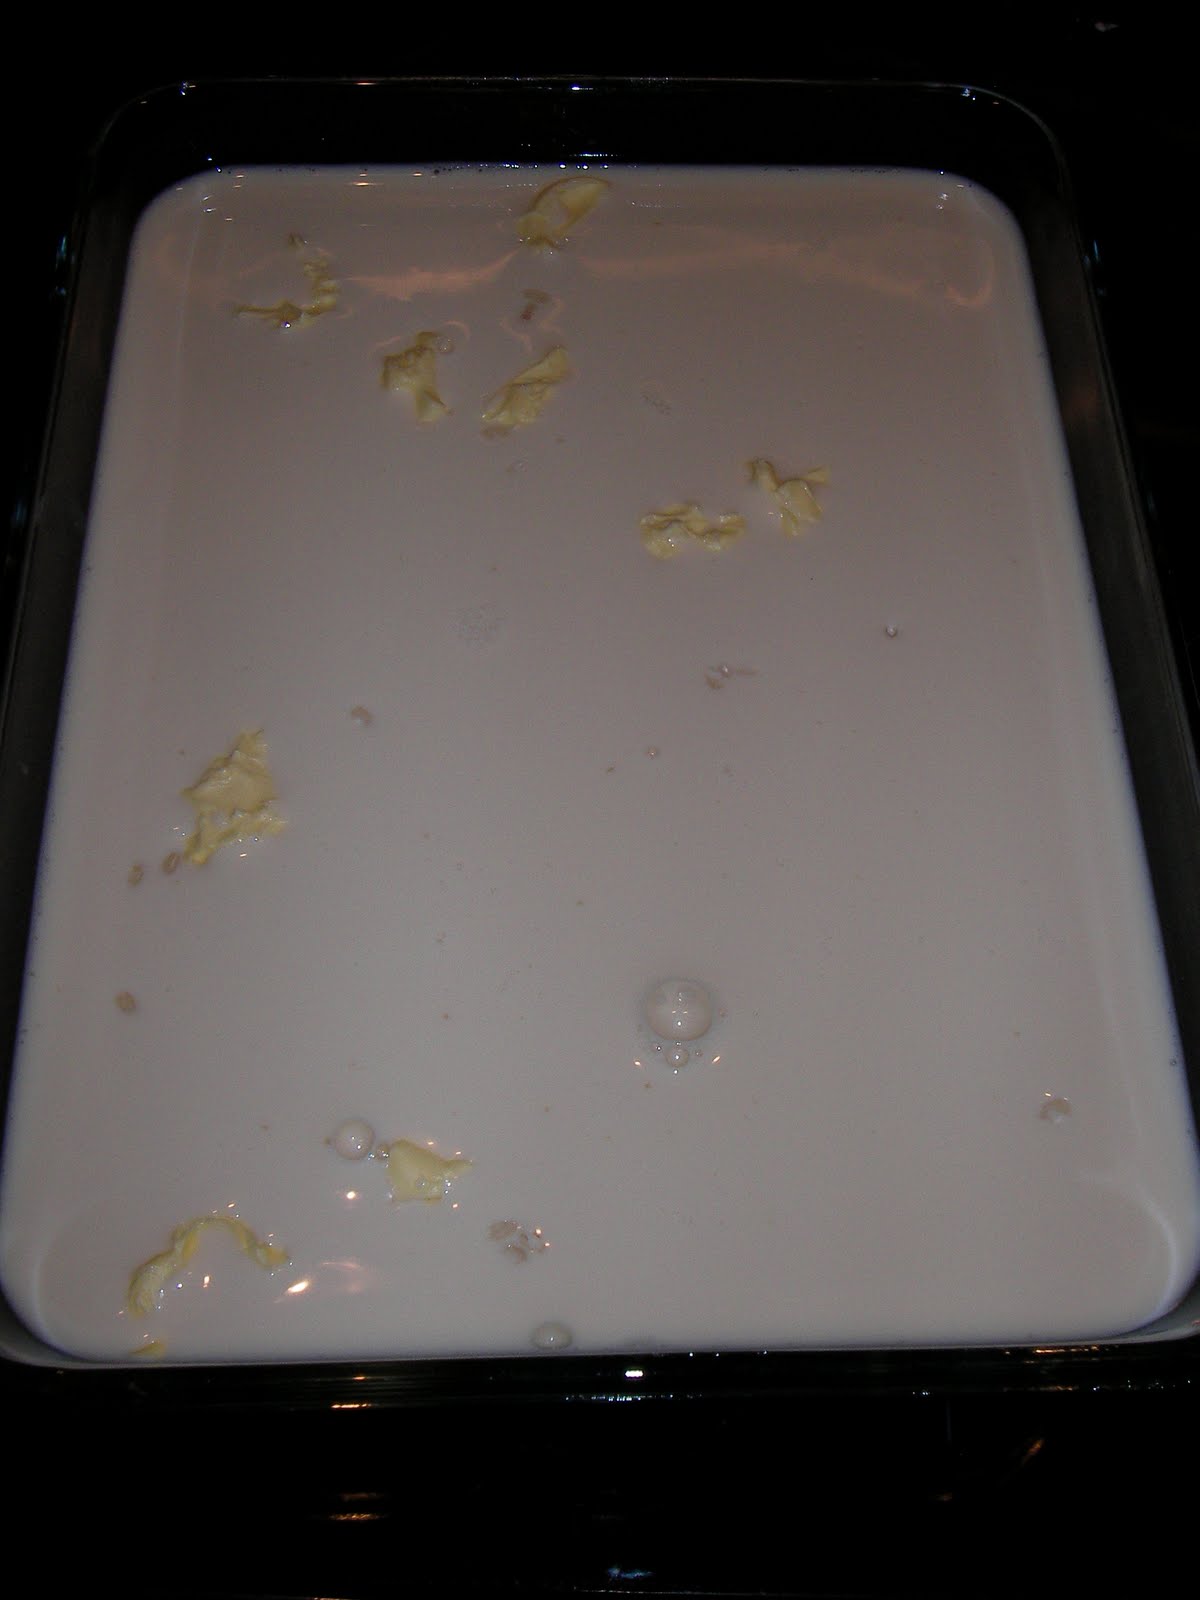
Heat the oven to 150°C and then place the whole lot into a shelf somewhere in the middle of the oven.

Leave it for half an hour before giving it all a good stir. Then leave it for another half hour before stirring it all again. Then repeat one more time. The last time, the rice should be starting to absorbing the milk and swelling up. Make sure it's not sticking to the bottom before putting it back in the oven for the final half hour (that's 2 hours total cooking time).

Give the lot a good stir before serving into bowls. Apply jam or other toppings liberally.

***

Coming up:

- No idea. It's Christmas... probably won't blog again until the new year.

Tuesday 7 December 2010

The Children's Cookery Book

Hello everybody. I haven't been doing a lot of cooking recently, so I've not much to put up at the moment.

I did, however, find a particularly brilliant cookery book at the market on the weekend...

***

For a pound, I couldn't resist. What a bargain - The Children's Cookery Book from 1978.

Not only is it the most awful set of recipes I've ever seen, but the pictures are creepy, and the two children who populate the book's pages are very scary indeed. This all adds up to make it the best cookery book of all time.

That's right. A mashed potato face. The worst thing about this particular monstrosity is that it does not even teach the children how to make mashed potato - it instructs you to use instant mash... What?! Unbelievable. I refuse to believe that children of the 70s were incapable of peeling and boiling spuds.

Another particularly ridiculous recipe was for 'sausage boats'. And yes you are reading the recipe correctly. Sliced, processed cheese. Filth. What sort of cookery is this? The book does have a couple of redeeming qualities though.

First and foremost are the scary children. They just make the book a wee bit special... Ha. Aside from that though, is the Molly mistake section. On most pages there's an illustration of the world's most unfortunate wee lassy, who just doesn't have a clue how to cook.

I've decided to take this on board in the blog - from now on, if I have a howler in the kitchen, it goes in. And I'll find a wee picture to go with it. I'll call it a David Disaster.

To finish though, a fantastic recipe that does it's best to salvage the repertoire of the book. I say fantastic... but it's only fantastic by the rest of the book's standards. Let's be honest though, a cake made to look like Dougal from The Magic Roundabout has to be a winner. I might even make this for work...

***

Coming up:

- Dougal?

Monday 29 November 2010

Chilli Con Carne

So the mystery of the secret weekend cooking can be revealed!

It was mum's birthday at the weekend, and a lot of family and friends were down from Scotland - as well as a few others from England - so I cooked a big pot of chilli to sit with all the rest of the food that my sister and her friend had put together.

As a side note, the promised tangerine sorbet has not come to fruition as I've been sick since Saturday and so haven't gotten around to it. My bad.

***

I forgot my camera when I went to mum's, so I just have one picture that I took with my phone. It's not especially brilliant, but who doesn't know what chilli looks like?

You will need (cooking for about 20):

- 4tbsp oil
- 4 onions
- 4 cloves of garlic
- 2kg beef mince
- 500ml red wine
- 800g canned, peeled tomatoes
- 800g red kidney beans
- 8tbsp tomato puree
- 8tsp dried ground chilli
- 2tsp ground cumin
- 2tsp ground coriander
- 2 beef stock cubes

This is a fantastic recipe in that it can all be put together in one pot. For this many people, the cooking takes around 2 hours or so.

Start by dicing the onions up very small. Crush the garlic cloves and then fry them off with the onions in the oil. Once they start to brown, add in all the mince and brown it too.

The mince takes a fair wee while to brown all the way through. Just keep turning it over in the pan until it all takes on colour.

Now for the wine - pour it all in and then cover the pan for a few minutes until the whole lot starts to boil. Let the alcohol cook off for about five minutes.

Next up is all the seasoning. Add in the tomatoes from the cans (make sure to chop them well first if they aren't pre-chopped), the tomato puree, the chilli, cumin, coriander, and crumble in the stock cubes. Give the whole lot a good stir before covering once again.

Turn the heat down a bit and leave the pan to simmer for about an hour.

Once the hour is up, uncover, add in the kidney beans and cook for a further twenty minutes.

Once this time is up, you're ready to serve - best with rice and pitta breads.

Enjoy!

***

Coming up:

- Who knows?

Friday 26 November 2010

November Catch-up

I haven't updated anything like as much as I could have done this month... so this blog may be a little longer than usual. Or a lot longer. It really depends on just how long I can be bothered to type for (it is 23:26 at time of writing) and whether the wonderful sounds from OceanLab coming from my speakers are enough to keep me awake.

Anyway, there will be a fair bit to chew through, so let's crack on.

***

On the 21st I was very much in the mood for some steak. Peppercorn sauce. Onion rings. Chips. Yes yes yes.

I'm not going to list the ingredients, because this is so simple to do (I'm excluding the chips and onion rings here because they were out of a bag. Shame on me, whatever.)

Start by crushing a few whole peppercorns with a mortar and pestle. You can use pre-ground black pepper I suppose, but the flavour wouldn't be as intense.

While crushing the peppercorns, set a heavy based pan with a little oil on a high heat. Once the oil is up to temperature, pat some salt and pepper into the side of the steak you are going to lay facedown in the pan. Stick it in the pan and then pat in more seasoning onto the reverse.

I was cooking rumpsteaks, about half an inch thick. For this sort of size and cut, two minutes on each side is an adequate amount of time to fry. Once the steak has cooked, set it aside to rest but keep the pan you were using - just lower the temperature a little.

Time to add your peppercorns into the pan. Allow them to heat in the beef juices for a while to release their flavour and aroma. Add to this one beef stock cube and about 3tbsp water. Let this all simmer down before adding about 150ml cream. Stir it all together well so that it combines - do not let the sauce overheat and split.

Once the sauce is ready, you're ready to plate up. Pile up the chips, onion rings, steak and liberally douse the lot with peppercorn sauce.

***

Next up was to make a cake for a colleague who was leaving work and moving to Scotland. Finally the mystery of the reasoning behind the caramel sauce is revealed!

The trial run from the last blog meant that the caramel worked much better this time around... however the cake as a whole didn't.

I should start by saying that the cake was a bit of a concept idea, so I was never sure whether it would work. Though I don't see a reason why it wouldn't. I think it was just down to some poor execution on my part which is why it never saw the light of day at work (sorry everybody!).

The idea was to create a cheesecake with a peanut brittle base and a banoffee topping. With a peanut brittle base, the cheesecake could not be baked, so it would be a gelatin set affair.

I'm not going to put a recipe or anything up, because mine clearly didn't work. But one day I'll get it sorted. For now, I have a bowl of all the three elements mixed together in a large lumpy mess. It tastes good, but it's no finished article. Basically I think I didn't get the temperature of the sugar mixture up high enough when making the brittle so it never set so as to give a 'snap' when broken. It went firm but a little gooey.

Like I say though, still delicious, and I'm getting through it gradually (it's sickly sweet).

***

And finally, to show that not everything I eat or create has to be extravagant or amazing or even remotely tasteful, I had cheese on toast with beans this evening (before going out for a curry...).

Here is what I did to the beans...

You will need:

- The contents of your stockcupboard (You must not discriminate - whatever comes to hand!)

Heat a little butter in a pan, just enough to fry off half a red onion, finely diced with a good helping of salt and pepper.

Once the onions are browned, it is time to put the beans in the pan. At this point, your recipe may vary drastically from mine - just mix stuff in from your stockcupboard. Leave nothing out. I threw in a good dash of tabasco, a splash of HP sauce, and some worcestershire sauce too. Give it a good stir and allow the beans to heat through.

Serve on toast and cheese. High cuisine indeed.

***

Coming up:

- It's the Christmas meal for a few of our friends this coming Monday (some of them are away over Christmas and we are having a farewell dinner sort of thing) and I am bringing pudding. Tangerine sorbet is definitely on the menu, and I had said chocolate fondants too... but I feel that's a little ambitious for ten people. So it'll be some sort of hot rich pudding followed by the sorbet as a cleanser.
- I'm cooking over the weekend too, but that's a secret for the moment (similar situation to the caramel story!), but all shall be revealed.

Wednesday 17 November 2010

Macaroni Cheese And Caramel Sauce

Not together of course - the macaroni and the caramel that is. It's been a while since I've blogged, but I've been trying a couple of things over the last few days. The (mixed) results of which are below...

***

With a couple of friends coming over before we went out to football on Tuesday, we were in need of some food that would provide a bit of stamina for the cold night.

Sport and pasta. What a combination. Macaroni and cheese. Another blinding duo. What better dinner to make under the circumstances?

Macaroni cheese is a spectacularly easy dish to put together and can be tweaked in a whole variety of ways to add interest - be it throwing in a bit of chicken, bacon or mushrooms. Maybe some chillis or other vegetables.

Anyway, I went for a pretty straight forward version with just a bit of tabasco sauce for a wee kick.

You will need:

- 300g macaroni
- 40g butter
- 40g plain flour
- 600ml milk
- 300g grated cheese (I used red leicester, but any will do. I suppose if you want to be vaguely traditional there should be some parmesan in it...)

Start by boiling the pasta until it is soft, but still with a bit of bite.

Once the pasta is ready, drain it and set it to one side while you make the cheese sauce.

The sauce is made from a roux base - that is butter and flour. Simply melt the butter in a pan before whisking in the flour.

Add the milk in, a bit at a time, whisking all the while. At this point start to whisk in any seasonings you are going to use. I added a little salt, a lot of black pepper and a good splash of tabasco. Allow the sauce to thicken before removing from the heat. This will take about 5 to 10 minutes.

Once off the heat, put about 250g of cheese into the sauce and whisk it in until it's all melted and you have a beautifully glossy, yellow sauce. I chose the red leicester for a bit of extra colour (as above).

Finally, combine the pasta and sauce. Lay the pasta in a deep ovenproof dish before pouring the sauce over the top and letting it sink through.

Grate the rest of the cheese onto the surface and then place it under a grill for 5-10 minutes. The cheese should start to bubble and brown and the macaroni is ready to be served!

***

Now for the caramel sauce.

I'm not going to say a whole lot about the reason I was trying to make this... it involves work... and as some people from work read this I shall have to keep schtum about it. You'll all find out soon enough.

Anyway, it's part of what I will be making, and I've never made a runny caramel before, so I thought I'd best test it before I did it for real. And I'm glad I did, because it needs some work...

You will need:

- 1 tin condensed milk (about 400g)
- 150g butter
- 150g soft brown sugar

It should have been easy, but I made a couple of mistakes.

Start by melting the butter in a pan. Add the sugar to this and heat through until it has all dissolved into the butter. Make sure the sugar has all dissolved. I think I didn't quite give it long enough at this point.

Now pour in the condensed milk, stirring it all through.

Keep stirring constantly. Because I hadn't let all the sugar dissolve, and I was fiddling with the camera, some settled to the bottom and burned. Not so good.

Ideally, once the caramel is starting to boil, take it off the heat and set aside to cool before using. However, I ended up with wee flecks of burnt sugar in the sauce. I think I'll use a little less condensed milk next time around to give a thicker caramel too.

Let's hope it goes better in the near future.

***

Coming up:

- Well, what is that mystery caramel for?

Sunday 7 November 2010

Coconut Macaroons

What do you do if you're hungry, there's nothing pre-prepared to eat, you don't want to spend ages making something, and you only have limited ingredients in the house?

Why, you make coconut macaroons of course. Provided that your limited ingredients include an egg, dessicated coconut and sugar...

***

Really fast and really simple this one.

You will need:

- 1 egg
- 125g dessicated coconut
- 75g caster sugar
- Icing sugar (optional)

Simply crack your egg into a bowl and give it a wee whisk.

Chuck in the coconut and sugar and work it with a wooden spoon until it comes together nicely. Should be fairly sticky.

Form little balls with a metal spoon and put them on a baking tray lined with paper. Put this all into the oven at 180°C for about 15 minutes. The balls will flatten out a little and should turn a deep golden brown.

Optionally you can glaze the macaroons with icing once they've cooled.

I made seven with the above quantities, but you should manage ten if you're a wee bit more conservative!

***

Coming up:

- That bakewell tart I promised.
- Currently looking at an 'alternative' Christmas dinner. Lots of details to sort out and research to do first though!

Saturday 6 November 2010

The Cook's Library: A Cheference Guide

As promised, I've finally put together a few bits and pieces about some of the books I use for inspiration, reference (and sometimes just to take recipes straight from!) when cooking.

***

One of the main reasons for my wanting to put up a blog on this subject was actually my most recent acquisition. When I went to visit my parents recently, my mum gave me her old copy of The Glasgow Cookery Book from 1976. Originally produced as a college textbook, it's a fairly well known reference book throughout Glaswegian and Scottish homes.

It's a fantastic book with hundreds of recipes spanning all sorts of cuisine, and of course encapsulating the always comforting Scottish cuisine.

This particular copy, having been my mum's, is of particular interest due to all her wee notes in the margins and the odd extra recipe written into the back.

Thanks mum!

***

Another recent addition was a copy of The Cookbook by Terence and Caroline Conran that I found in Witney's local market. I paid £1.50 for it... which is an absolute steal for a book that weighs a couple of tons. There really is a lot of book to this one.

With sections including the purachasing and preparation of food as well as just straight out recipes, the book is a bible for the kitchen.

With descriptions and uses for more ingredients than you could ever possibly use, it is an exhaustive look into the world of food and its preparation.

Particularly useful are the breakdowns on how to prepare meat and fish, how to get particular cuts from an animal, and so on.

Really, I can't recommend this one highly enough.

***

As well as standard cookbooks and reference books, I am interested in all sorts of cooking related reading material.

I have a fair stockpile in the house but I'll detail some of my favourites here.

The first two are books on particular foods. I have various books on chocolate, but definitely the best is Chocolate by Mort Rosenblum. Covering the ancient history of chocolate, from its first tribal uses, right up to its current status as a modern day aphrodisiac and healer of all ills, as well as providing insights into how it has changed culture and even religion. A fascinating read that even manages to find space for a few chocolate themed recipes.

The second cuisine specific book I've picked is The Connoisseur's Guide to Sushi by Dave Lowry. Again, focusing on one single type of food, the book is a wonderful look into Japanese culture, the preparation of Sushi, how it should be eaten, what to eat it with... there is probably no better Sushi reference guide. And if there is, please let me know about it!

Sticking with the 'not-quite-a-cook-book' theme, I have another two favourites that are sort of biographies.

The first is Raymond Blanc's A Taste Of My Life (again picked up at rock bottom price from Witney's local stall), which really is a straight forward autobiography of Blanc on his rise through the kitchen to eventually owning and running various restaurants.

Providing an insight into a very driven man, the book will certainly be of interest to anyone looking to go into cooking as a profession. The book also finds space for some of Blanc's recipes too.

My absolute favourite of the bunch has to be Tamasin Day-Lewis' Where Shall We Go For Dinner. More of a biography again, but one focused on particular events where food was the star. Be it travelling around the world to find a new cheese to sell in her partner's shop, or just trying out a local restaurant on holiday, the book is a real inspiration to travel and try new foods.

Well worth a read. Really.

***

And what tour of a kitchen library would be complete without a wee look at the book belonging to the cook who owns it?

It is indeed my own wee collection of recipes. The book was made for Claire and I as a wedding present by our friend Moira. She makes fantastic scrapbooks, and she deviated a little to make a cookbook with sections for all sorts of things. She threw in some divider pages and some of her own recipes (immaculately decorated, and with scripture and the like on the backs) and left space for us to fill it up in our own time.

I've been steadily doing that for the last three years, filling it with recipes I've trialled, or with recipes passed on by friends. If you've ever given me a recipe then it's in this book - with your name attached! Heather's banana bread is pictured above.

***

That then is a potted guide to my kitchen library. It's much more extensive than that, but you get the idea.

***

Coming up:

- I'm thinking bakewell tart. Yes, that sounds good.

Sunday 31 October 2010

Pumpkin Revisited

Think of this blog update as an appendix to the last. With a bit of pumpkin puree leftover I decided to make some soup.

It's a really straight forward thing to do - much easier than the pie!

***

I wasn't precise with my measurements - I just went by taste and what I thought it should come out like. But I'll guesstimate what I used...

You will need:

- 2 cups of pumpkin puree
- 250ml double cream
- 200ml vegetable stock
- A generous cracking of black pepper
- Plenty of salt
- 1tsp ground coriander
- 1/2tsp chilli powder
- 1 red onion
- 2 slices bread (for croutons - stale is fine)

Start by heating up some oil in a heavy based pan and browning the onion. The onion can be diced or chopped however you like really - the soup will be put in a liquidiser at the end, so whatever.

While the onions are browning, stick the pumpkin puree into another pot and put the heat on it.

Once the onions have browned, transfer them into the pot with the pumpkin puree. Add a little more oil to the pan that the onions browned in before slicing your bread into squares.

Once the pan has come back up to temperature and the fresh oil is heated, throw in the bread and fry it on both sides. Using the onion pan just means that the bread takes on a bit more flavour.

While the bread fries, add the cream, stock and various spices and seasonings to the soup pot. Give it all a good stir round. If it seems a little thin, you can always add a little cornflour to the soup to thicken it up. Remember that the onions are going to be blended into the soup later as well though, and this will give a little extra texture.

Take the croutons off of the heat when they're ready and place them onto some kitchen roll to absorb any excess oil.

Allow the soup to almost come to the boil, stirring regularly, before taking it off the heat. Pour the whole lot into a food blender and pulse it all round until the onions are well integrated into the soup, and the texture is like a very thick cream.

Simply pour this into some bowls and serve with the croutons placed on top. It has a fair kick, and is absolutely delicious.

***

I have plenty left over from today, so there'll be a wee bit in work if anyone wants to try it. Though it will also be serving as my lunch, so take it easy.

Coming up:

- See last blog!

Saturday 30 October 2010

Pumpkin Pie Squared

Pumpkin is in season at the moment, so I thought it might be worth a look at making something out of one.

I was meeting up with some friends on Friday night just gone who have a soft spot for pumpkin pie, so all the more reason to give it a shot.

Turns out that it's an incredible pain to make, takes far too long, and to top it all off... I don't actually like it. It was however, a foray into terra nova and an experiment in pastry making. Let the breakdown commence.

***

It's a fairly complex pie to put together, but I'll do my best to try and outline the steps.

I started by preparing my two pastries. I should explain that the pumpkin was rather large. Really big - about 8kg. I had enough pumpkin by the end for two pies and I still have plenty left over. Anyway, one pie I was making for my friends and the other I decided to take to work (which of course meant it had to be gluten free - all inclusive and all that!).

So two pastries it was - both shortcrust, but one gluten free and the other not.

For the pastries you will need:

- 175g plain white flour (175g buckwheat flour for the gluten free variety)
- 1/2tsp salt
- 1 tbsp granulated sugar
- 120g unsalted butter
- 20ml water

The making of the pastry itself is fairly simple. Just combine all the dry ingredients in a large bowl and give them a good mix.

Cut your butter into little cubes and start to rub it into the flour mixture by hand until you get the texture of rough breadcrumbs. Pour the water in a little at a time and start to pull the dough together until you have a ball which just holds.

Turn the ball out onto a clean surface and flatten out a bit by hand (no need to roll it out yet). Clingfilm the flattened disk and place it in the fridge for an hour to rest while you start the pumpkin filling.

It should be noted that the gluten free dough will be much less pliable than it's normal shortcrust cousin. It may take a bit of a tweak in the recipe to get right. I messed up a couple of batches trying to get it perfect, but I didn't take notes on the changes I made - sorry!

Give it a go though.

***

The pumpkin was a massive thorn in my side. The preparation time to get a pumpkin ready is tremendous. So if you're going to do this set aside a few hours. My total time from starting the two pies until they'd come out the oven and cooled enough to fridge was six hours.

Anyway, take your pumpkin and cut it in half. In the centre are a whole bunch of seeds and a gooey stringy centre that all needs to be scooped out. I found it easiest just to take a knife and carve round the outside of the centre by about 3mm all the way round. Then hack out the bottom and it all just lifts out. That description is probably not the best... here are some pictures:


Once the pumpkin has been 'gutted', take the skin off the outside. Again, a brutally sharp knife is your friend here. Pumpkins are a bit tougher than your standard vegetable and take a lot of work to prepare.

Once the skin is finally off, roughly dice the flesh and lay it all in an ovenproof dish. Pour in about an inch of water to the dish and cover with tinfoil. This needs to go into an oven at 200°C for about an hour or so. You can check that the pumpkin is tender any time after the hour by just sticking a knife into a piece. If it passes through easily, you're good to go.

***

While the pumpkin is tenderising in the oven, an hour will probably have passed and you can remove your dough from the fridge.

The pictures here are for the standard shortcrust, but the procedure is exactly the same for the gluten free version - just remember to dust your surface with buckwheat flour rather than normal flour!

Simply work your dough for a while until it becomes pliable again and rewarms. Then roll out your pastry so that it will comfortably line a 10" tin. It should be pretty thin, so be very careful when trying to lift it!

It is best to use a tin with a pop out bottom for ease of 'pie-exit' when it's finished.

For a little extra crunch in the pastry you can crush some pecan nuts or ginger snaps (or both) and press them into the pastry. Once done, re-cover the pie crust with clingfilm and put it back in the fridge while you make the pumpkin filling.

***

The base for the pumpkin filling is pumpkin puree. Up to this point, all that's gone on with preparing the pumpkin has been to get it to a point where it can be pureed.

Once the pumpkin is tender from baking in the oven, remove the casserole dish and transfer the pumpkin into a food blender. Then just pulverise it until it turns into a thick puree.

Your pumpkin is now finally in the state required to complete the dish!

For the pumpkin filling (one pie) you will need:

- 450g pumpkin puree
- 120ml double cream
- 3 eggs
- 120g muscovado sugar
- 1tsp ground cinammon
- 1/2tsp ground ginger
- 1/8tsp ground cloves
- 1/2tsp salt

Beat the eggs lightly in a bowl before adding the rest of the ingredients and giving the whole lot a good whisk.

Once you have a fairly runny mixture, remove your pastry from the fridge, uncover and pour your filling mixture in up to about half a centimetre from the top of the pastry.

Then it's all ready to go into the oven. Heat your oven to 190°C and then put the pie in - roughly in the middle is best.

They take about an hour to bake and a further hour or so to cool before they're ready to be fridged (or served). When removing the pie from it's tin, simply place a soup tin or similar on the counter and push the tin gently down on top of it. The bottom should pop out with the pie resting on top and the rest of the tin can just drop past it. Simply then transfer the pie from the tin tray to a serving plate.


Probably best served with a dollop of vanilla ice cream, or just a good serving of thick, whipped cream.

***

Coming up:

- With the leftover puree, I'm looking into pumpkin soup recipes. Maybe I'll like that better than the cake.
- Also thinking about a blog covering some of the books I use for reference. Maybe.

Saturday 23 October 2010

The Zero-Skill Sausage Stew

This is one of Claire's favourite dinners that I make... I've been a wee bit apprehensive about putting it on here, as it's a bit of a cheat (gravy granules and all that), but they can't all be restaurant gems, can they?

***

The stew will serve three to four using the quantities below:

- 2 small / medium onions
- 3 carrots
- 8 sausages (skinless is better, but not essential)
- Gravy granules - you could make gravy from scratch if you wanted
- 3tsp cornflour
- Plenty of pepper to season

Start by preparing your vegetables. Include potatoes in this if you are going to serve mash as an accompaniment. I usually do, but because I recently put a mash recipe in here I'm not going to duplicate. Just roughly chop the carrots and onions.

The cooking begins by frying the sausages off in a little oil. Use a large pan - the whole stew is a one pot recipe. Skinless work best for the recipe as skin on the sausages tends to peel off later in the cooking process and float in the gravy... not so nice.

Once the sausages are just browning, add in the onions and sweat them off. As they start to colour, turn on the potatoes to cook and throw the carrots into the stew pan. Grind plenty of pepper on top of the whole lot - no salt for this recipe as the gravy provides all you'll need.


Give the carrots a couple of minutes before lowering the heat on the pan. Make up the gravy (about 1 1/2 pints is good) and mix it with the corn flour to thicken it. Pour this over the sausages and veg.

Put a lid on the stew and let it simmer for about twenty minutes while the potatoes for the mash finish boiling.

Prepare your mash and then lay it in bowls as a base for the stew. Then ladle generous portions of the stew over the top. A great winter warmer.

***

Coming up:

- Pumpkin pie for Friday...